Building your own sea kayak part 2: hull & deck


The first strips are on. I spent a while setting up the forms on the strongback and securing them with cleats. I then cut and shaped the stem pieces seen here on the bow.
First strips
The first two strips (on each side) are the most important because the rest of the strips follow in place. The lower one is the sheer strip. This is the strip that joins the deck and the hull together, where you would find the seam tape on a glass boat. I’m using cove and bead strips so first I had to remove the bead from the sheer strip. Then the strip had to be beveled so when the deck is laid there is a perfect seal between the deck and hull. The sheer strip is also beveled thinner at the ends to allow it to bend. The upper strip is placed almost straight, more in line with the chine. This makes adding the following strips much easier without having to bend each one.
This is the progress I made earlier today. Both sheer and second strips are on both sides and I have started building up the strips toward the bow on the left.
See how the strips are following the second strip which is placed in a straight line. Each strip is beveled to a point to fit snug between the sheer. You can also see here I’m using a mix of staples, masking tape and spring clamps to hold the strips together while the glue sets.
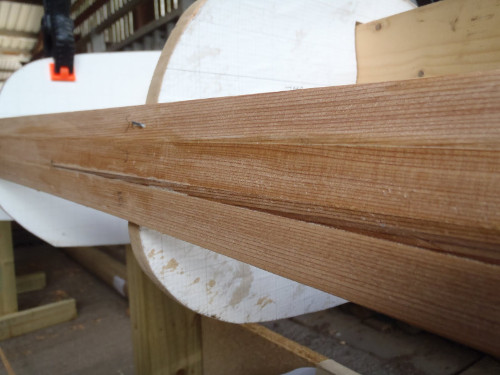
The sharp bevel point can be clearly seen above with the darker strip. I’m getting really messy with the glue and I have a feeling I’m going to have a few small gaps to fill. So far I can honestly say it’s going easier than expected but progress is very slow. I took me about two hours to fit two whole strips and two beveled strips today. A Special thanks to Barry at FourPosters for supplying the strips and getting them to me packed so well. The wood looks lovely, shame my handy work is spoiling them.
Stripping the hull
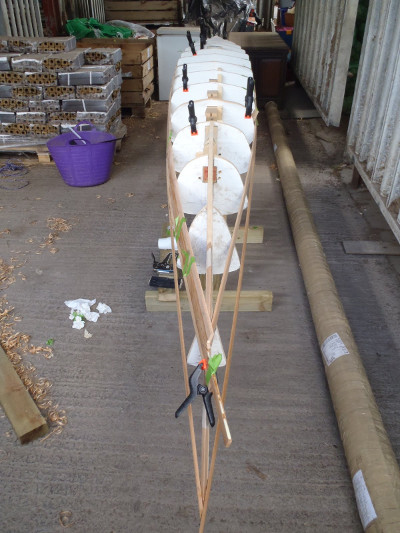
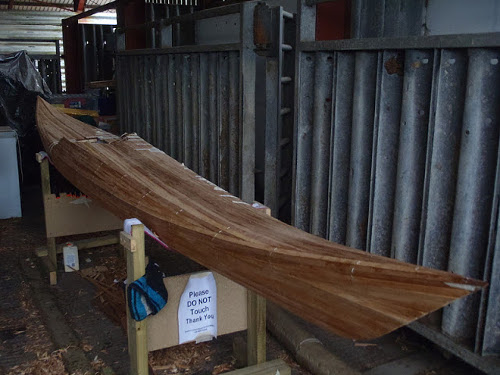
Granted it may look more like the Trojan war horse the Greeks used to deceive the Trojans…(it even has legs).
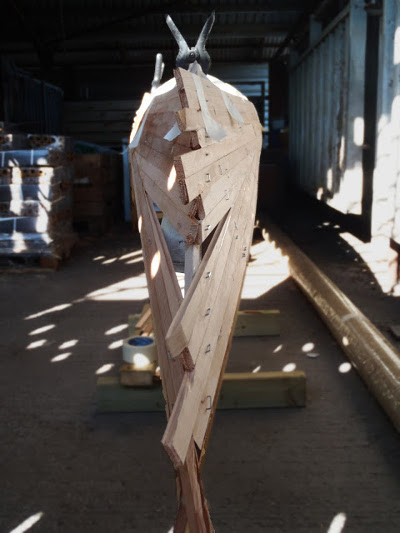
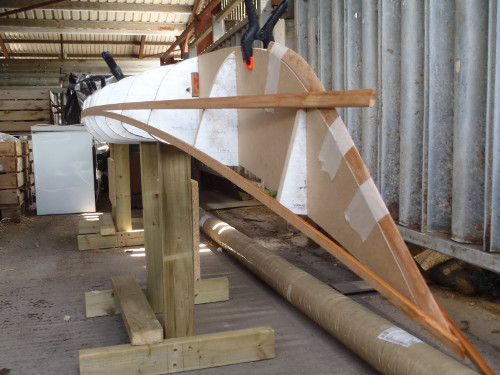
…But with some deceiving of my own and a little help from photo-shop it looks more like the up-swept bow of a Viking ship (below). All I’ve done here is flipped the photo upside down and shaded the ends which will eventually be cut, sanded and capped with an outer stem.
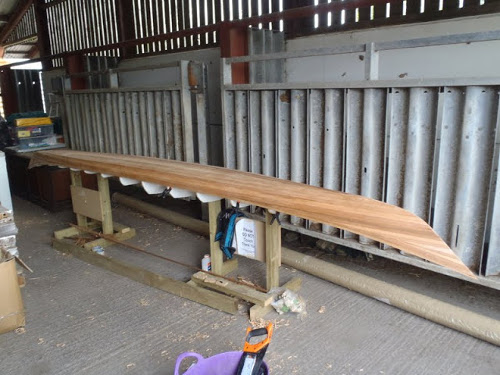
The Stern (below) is proving to be a little difficult. While the strips at the bow are still running straight and vertically the strips to the stern are being beveled, twisted, clamped and stapled.
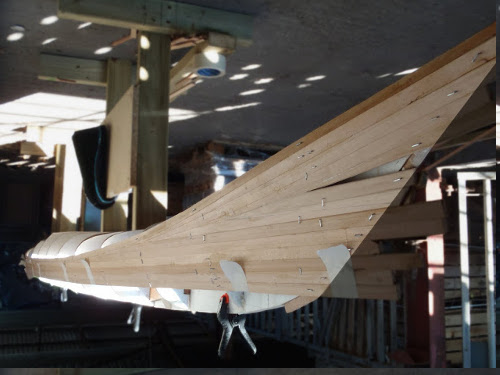
I’m now at the point where all the strips have met the chine on the hull and will start to run horizontally. It’s going slower than I had hoped, although this is my busiest time of the year. Maybe I should have left it as a winter project. I try to fit at least a couple of strips each visit and slowly but surely I am making some progress.
The bow is almost filled in bar one small slither of a strip each side. You can see here I’m not afraid to use the staple gun. I’m looking to build a boat not a piece of furniture, small staple holes are evidence of the workmanship gone into it.
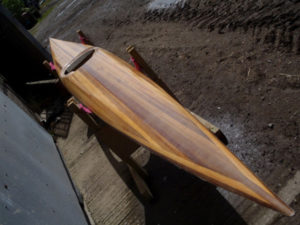
Finishing the hull
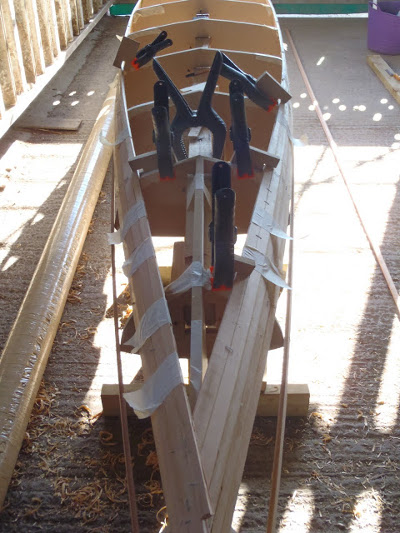
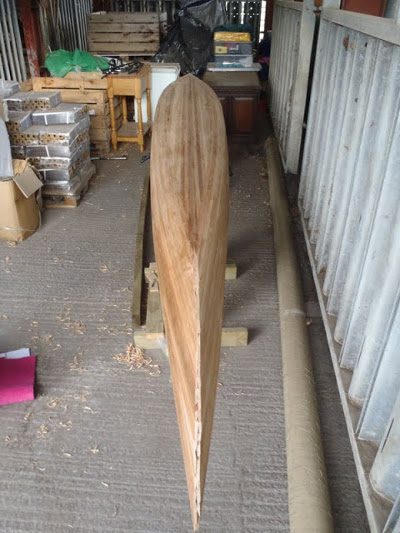
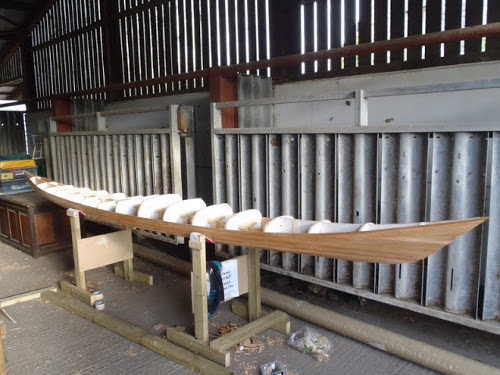
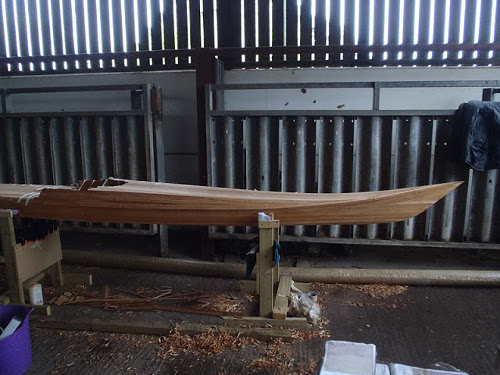
Half way there! I have finally finished stripping the hull. I’ve been putting in a little time at the end of each working day, usually getting at least two strips in. It’s finally paid off with some progress.
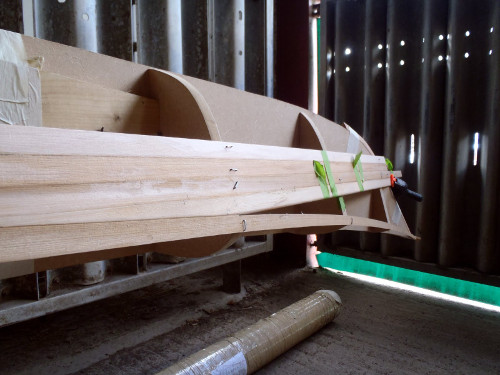
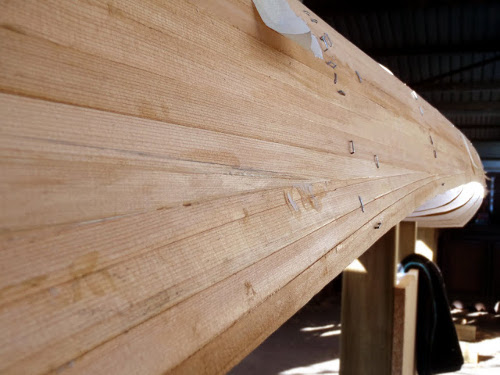
I think I have now perfected the technique. I added the keel strips leaving two moon shaped gaps on either side, then filled in the rest. The last strips were a bit difficult and I think a bit of wood flour and glue filling will be needed. I sawed off the ends and planed them down, they will eventually be capped off with a stem piece. The ends can probably be planed back about another inch, almost to where the internal stem piece is, so you can ignore that chip in the bow.
I have a few slightly darker strips so I tried to be a little creative. Once it is planned, sanded, glassed and varnished the contrast will probably stand out a little more. Either way I not entirelly bothered, who’s gonna see the bottom. I stood back and looked on at my achievement and had the urge to pick it up, sling it on my shoulder and go for a paddle. Not quite ready yet!

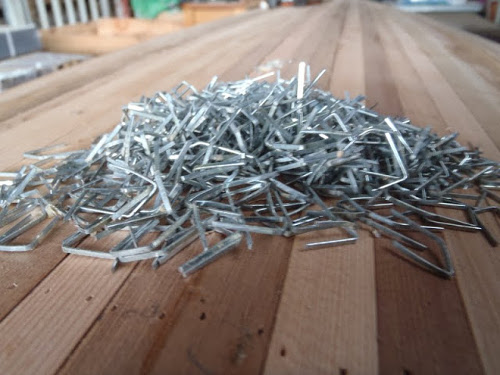
I spent a few hours pulling out the endless amount of staples, I’m gonna try not to use so many in the deck. I then flipped it over an rested it on the floor while I fastened some old carpet to the supports to act like a sling while I work on the deck.
Today I went back with a hammer to gently knock the forms free to remove the strongback. I didn’t have the camera on me but it looked great, like an open canoe. I placed the stongback back in and put a few staples back in to keep it from warping. Now work begins on the deck…
All hands on deck
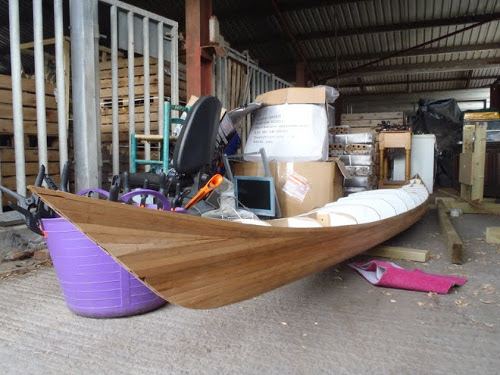
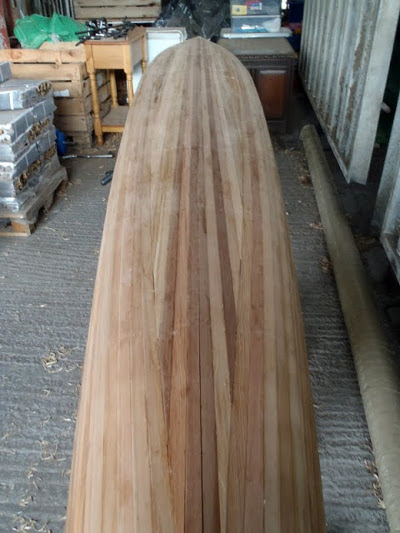
The deck is complete and brought stripping to a close. It actually didn’t take me long to strip the deck, only a couple of sessions.
It’s a great feeling to stand back and look upon a solid boat I have built. In reality I’m probably about half way done. The light in this barn isn’t great, hard to get the lines of the boat to stand out.
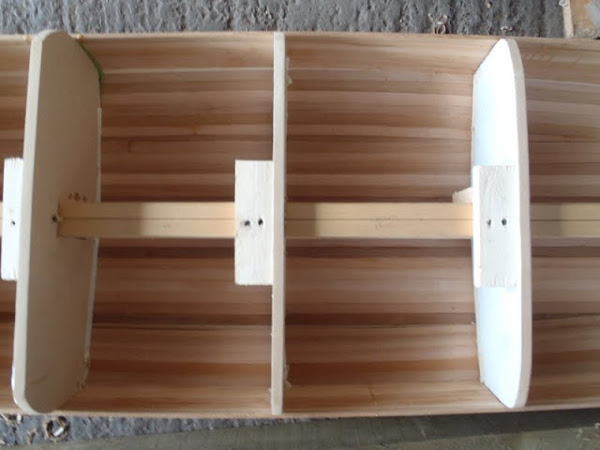
The cockpit area hasn’t been cut clean yet that’s my next job. I’m actually having a bit of trouble with that. I’ve cut out the paper template and it doesn’t fit properly. Not a major issue but it makes getting an absolute symmetrical outline a little harder. I removed the staples and tape today and had a go at fairing and sanding the deck. I’m also having difficulty finding a supplier of some ultra thin strips for the cockpit rim and stem pieces.
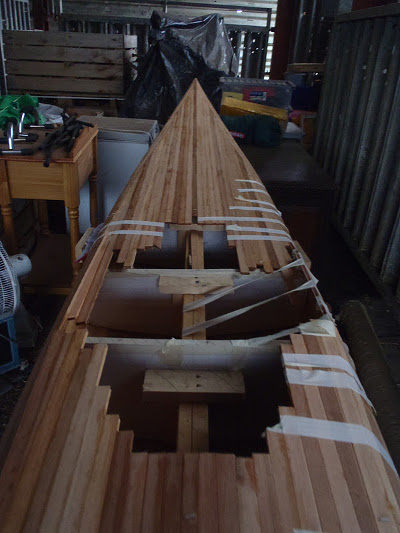
What’s left? Next I have to fit the cockpit recess. Then I have to scrape, plane and sand all the surfaces fair. After that comes the glassing, deck and hull separate. Then the cockpit coaming and lip followed by more glass. Next is the hatches then glassing the two halves together and adding the stem pieces. Last I have to fit all the out-fittings such as bulk heads, seat, foot rests, skeg and deck lines. Each of these jobs has a hundred smaller jobs involved in the process. I’m really chuffed with my progress and really excited about getting it on the water. A little money and time and it would be done in no time. Unfortunately I have very little of either so it’ll have to take a little longer.
The views expressed in our blog are those of the author and not necessarily lowimpact.org's
 Fancy kayaking around the Cornish coast to raise money for the Marine Conservation Society?
 Building your own sea kayak part 1: forms & ‘strongback’
 Building your own sea kayak part 3: cockpit, sealing & fibreglassing
 Canoes & kayaks


