Building your own sea kayak part 1: forms & ‘strongback’


I’m going to post three articles about how I built my own sea kayak, followed by some articles about the adventures you can have once you’ve built it. The idea is that you buy some detailed plans and follow them carefully. They will guide you through every step of the build. In these articles, I’ll show you what happened when I followed some plans that I bought from Guillemot Kayaks in the US. I’ll include lots of tips and things I learnt. I’m just an enthusiastic amateur, and so if I can do it, so can you.
The idea
I have decided to start a new project, building a cedar strip kayak. I toyed with the idea of building a kayak at first but as I have learned more about the building process I have become more enthused to build one. I know it not everyone’s cup of tea, it wasn’t really mine at first, but after seeing some other blogs about successful builds, I decided to give it a go. The idea of turning a pile of wood and glue into a beautiful boat and imagining the places it will take me is quite exciting.
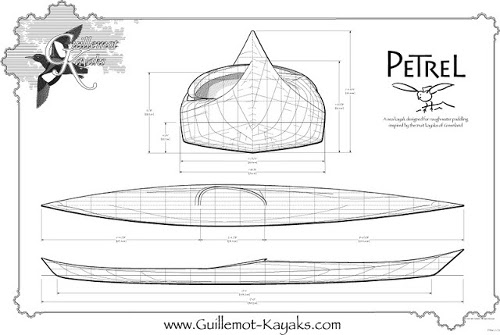
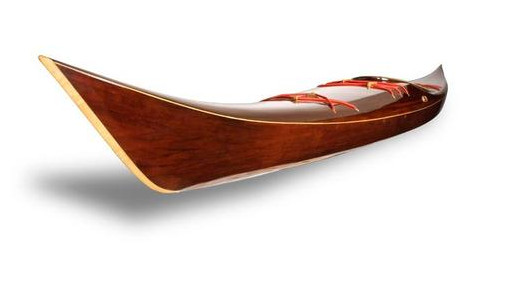
This is the Petrel designed by Nick Schade founder of Guillimot Kayaks in the USA. It was designed as a responsive, light weight boat suitable for day trips in rough water but also at home in sheltered coves and estuaries. It is a 17ft boat which does suite the smaller paddler (ideal). It is a lively boat which accelerates quickly, carves down wave faces and maneuvers easily.
It does mention that it does not have the capacity for extended trips yet it is bigger than my boat and lets face it how many multi day trips have I done. I’m sure it will be fine for the long weekends. I am going to build mine with all the modern bits and pieces such as rubber hatches, skeg, foam seats carbon fiber rims etc.
I am in no rush, I will buy the parts along the way an hopefully have it in the water by the time I go up to Skye in September. I am currently in the process of drawing out the forms (backbone to which the strips are laid). Only one major set back so far, I don’t have a place to build it. Most garages I’ve been able to acquire are roughly 15ft long!
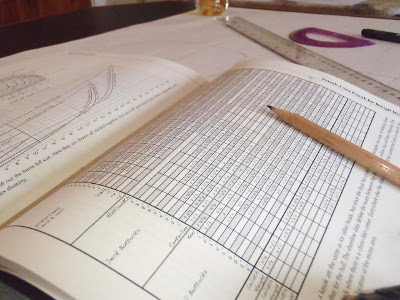
Drawing the forms
All this nice weather and I’ve barely been out in my boat – this is what I’ve been doing instead. I’ve been busy drawing up the forms on to graph paper, a bit like marking co-ordinates on a map and then joining the dots. The outcome is a cross section slice of the boat which is then transferred on to 1/2 inch thick MDF. These cross sections are then threaded on to a 14ft length of 2×4 called a strongback. This strongback is essentially the backbone of the boat upon which the cedar strips are laid. It is important all these ‘co-ordinates’ are in the right place, a 1/4 inch out and I end up with a oddly shaped boat. There are 16 cross sectional forms all together and two end forms (bow and stern). There is also a cockpit recess and hatch forms to draw out but I’ll do that when the time comes for installing them.
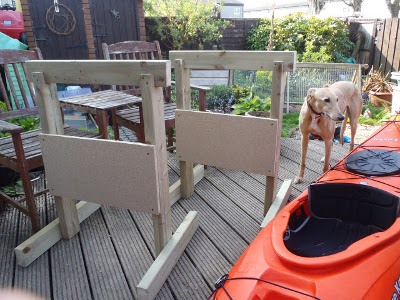
On my rainy day when I can’t work (fortunately only one) I made these two saw horses to support the strongback. They also double as a kayak stand when I’m finished, the top cross beams are removed and replaced with a loose webbing where the boat can sit.
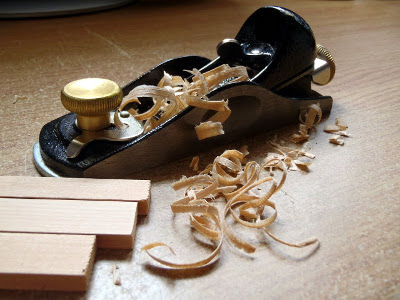
I’ve also been busy sourcing my tools and materials. I am literally starting this boat with nothing. I bought this shiny new block plane, probably the most expensive and key tools for the job. I’ve also found a good supplier for the cedar strips and been playing about with some test strips.
Wow..and that’s doesn’t include any materials that will be include as part of the actual boat. From what I’ve seen it should cost no more than around £800 for the entire build, but that obviously doesn’t include all the extras such as tools and supplies of which I have few. With a boiler on the blink don’t expect progress to be quick!
Cutting the forms
No paddling again this weekend so I put my time to good use and finished cutting the forms. I have put a request in for the cedar strips which I will order for delivery in a couple of weeks. I am getting the strips from Cedarstrip who are very reasonable and have put aside some quality wood for me, best quality they’ve had in a long time apparently.
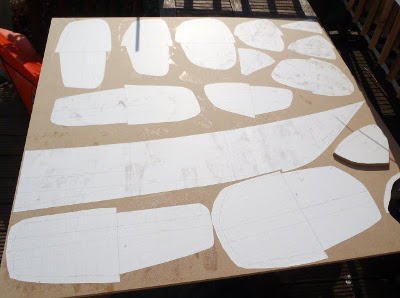
I drew the right half of the form on a sheet of graph paper then folded over the half and traced the left side. I then glued each form on to a panel of 1/2′ MDF and roughly cut around each one. Tip for anyone using spray adhesive. Just spray the MDF not the paper, otherwise the glue starts seeping through giving the paper a wet look like some of the top forms below.
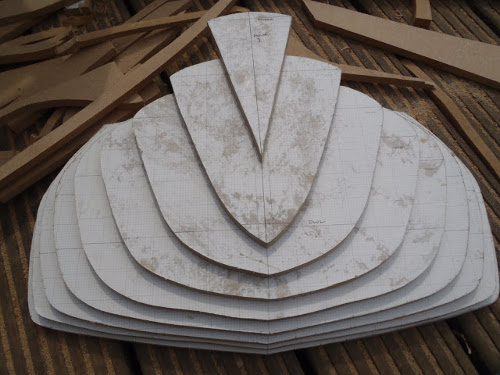
Both the bow and stern end forms have an outer stem at the end that is cut from a separate piece of cedar or other soft wood and temporarily glued on the to ends of the end forms. These stems are beveled to form a sharp edge upon which the strips are glued. These stems will form part of the actual boat and wont be removed. I have cut off the Stern stem here from the MDF just to practice until I get the cedar wood.
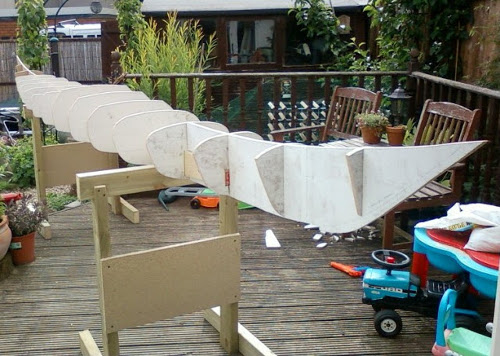
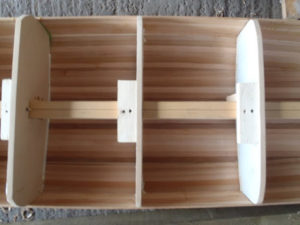
My next job is to cut a hole in the center of each form through which the strongback it thread. There are various ways to construct a strong back but I am going to keep things simple and get a 12ft length of 2×4 timber. Once the strongback is constructed the boat will then be ready for stripping.
Strongback
This week while I’ve been off work I managed to source a very straight piece of 2×4 timber for my strongback. This is where all the talk about forms and strongbacks makes sense. For the first time I get to see the actual shape and dimensions of my boat.
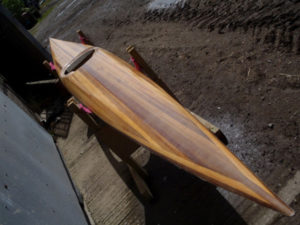
As mentioned in the plans the volume of the boat is not huge, described not as an expedition boat but more of a day or weekend boat. Very slim and long, god knows where I’m gonna store it. The area behind the seat is very low and flat in the Greenland style for ease of rolling. The deck has a sharp chine to provide height for the knees but low overall. There is plenty of rocker for manoeuvreability. The chine forward of the cockpit is soft providing smooth performance pushing out into waves and prevents broach while surfing. The chine to the aft is much harder which provides shape to facilitate carving and leaned turns.
I have not fixed the forms in place here. I have cut the holes in the forms, cut and shaped the strongback to size and simply stung them on. I need to move the whole lot to the farm before I start fixing things together. I also have to add the internal stems pieces to the ends of the bow and stern.
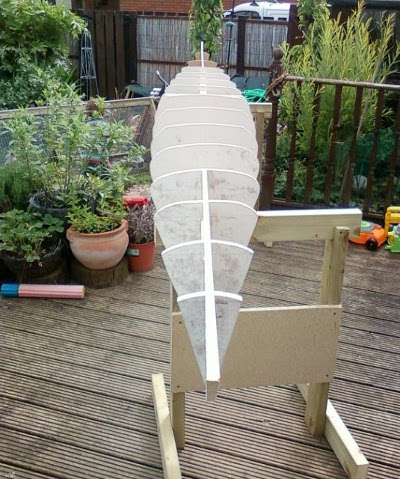
Considering I haven’t fixed anything in place nor lined it all up properly it’s looking pretty straight and fair. The are a couple of dips in some of the forms which I will have to sort when I start laying the strips. One other thing I noticed when picking it up and rolling it over is how it’s so balanced already.
Part 2 is here.
The views expressed in our blog are those of the author and not necessarily lowimpact.org's
 Building your own sea kayak part 2: hull & deck
 Building your own sea kayak part 3: cockpit, sealing & fibreglassing
 Fancy kayaking around the Cornish coast to raise money for the Marine Conservation Society?
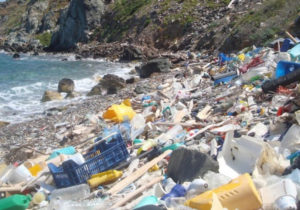
 New report: number of plastic bags on UK beaches falls by almost half – so charging 5p for plastic bags works?
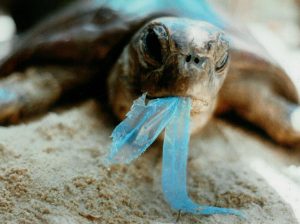
 More plastic than fish in the oceans by 2050? Could you give up plastic?
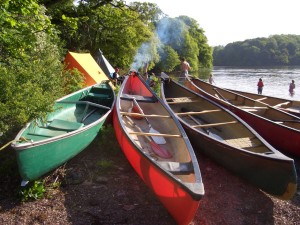 Canoes & kayaks


