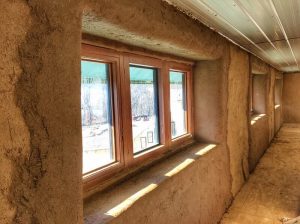
How to plaster straw-bale walls with clay: the first coat
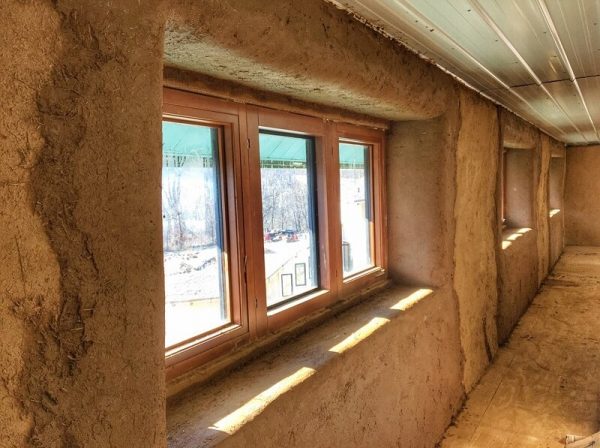


Sigi Koko of Down to Earth Design shares her top tips for how to plaster straw-bale walls with clay, beginning with the first, or base, coat.
In this post, I address issues and tips learned through trial and error over many years for the first coat of clay plaster applied directly to straw-bale walls.
Goal for your first coat of plaster
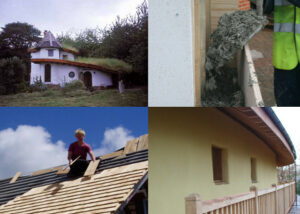
The primary goal for the first coat of plaster is to create your bond between clay and straw. In contrast, the goal for the second coat is to shape and sculpt the wall to the way you would like it to look, while the final finish coat is where you achieve your textures and sometimes colour. The straw-bales provide ample surface area for the clay to bond to, so I do not use any lathing or metal mesh or anything else that may actually get in the way of working the clay directly into the straw. Instead, I work a sticky clay plaster directly into the straw surface.
Because the goal is coating the bales with a well-bonded layer of clay plaster, your first coat of plaster often follows the contours of the bales. This means the first coat is usually not that pretty, but rather comes out pretty lumpy and bumpy. This is OK! You will shape the wall with the next coat of plaster. It is more important that you set up great contact with the straw-bales so that the weight of all the plaster to come adheres well to the wall surface.
You can shape the wall a little bit with this coat of plaster, especially in wedged areas, like the cracks between bales, but remember that the clay is a liquid until it dries and its stickiness can only support a limited weight of plaster before it flows off the wall. If you find the plaster is slumping, this is usually a sign that your plaster is too liquid or that you have put on too thick a layer and the weight is pulling it off the wall. Once the plaster dries, it is bonded to whatever it is touching, so it’s best to be patient, use a thinner layer, work it into the straw really well, and wait until it dries and is strong before adding more weight with subsequent plaster.
Wall preparation for your first coat of plaster
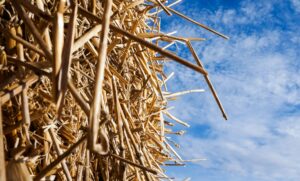
1. Shape the straw
This means trimming the walls as closely as you can to the shape you want. Spending more time shaping the straw pays back in magnitudes time saved when later mixing and applying plaster. I also cut niches and identify any truth windows prior to plastering the first coat.
2. Install your electrics
I find that it is much more challenging to install electrical boxes after you have plastered the straw-bales, so I get this out of the way before plastering. This also makes an electrical inspection more straightforward, if you need one, since you have not covered up any of the wiring with plaster.
3. Make sure your walls are tight
This means achieving a pre-compression of the straw-bales before plastering. If you plaster before the bale wall is compressed downward, then the weight of the plaster can cause the straw-bale wall to sag, leaving an open gap at the top of the wall. A gap can be filled in with insulation, but it’s usually easier, less stressful, and cheaper to compress the bales first. There are many ways to achieve a tight wall, starting with purchasing tight straw-bales to construct with. (The looser your bales are to start with, the more they will compress in place.) I make sure the top bale in any wall is installed very tightly up against some kind of framing above (floor, trusses, etc.). You can also use temporary straps to compress your walls. I’m sure there are many other solutions, but the general goal here is that the more compressed your straw is, the less your wall can settle from the weight of the plaster.
4. Trim the straw
The trimmed side of a bale, with all of the straw sticking out perpendicular to your plane of plaster, is an easier surface to plaster than the folded fuzzy side of a straw-bale. So trimming your bales with a weed whacker, chain saw, hand saw, or whatever works for you, saves you time applying the plaster. Trimming also gives you the opportunity to sculpt the straw surface to the desired shape of the completed wall, which saves you time mixing and applying plaster or cob-like plaster to fill in voids and shape your walls with clay later.
5. Fill in any voids
This also saves you time later! Unless you want your wall to remain lumpy and bumpy, I find it is the least amount of work to make sure that voids between the straw-bales (and at seams with other surfaces) are stuffed tightly with straw or light clay straw before I begin plastering. Otherwise you are making additional plaster or cob-plaster to fill those voids later. I use handfuls of long pieces of straw, align them all like a rope, twist the rope, and then fold it in half. This lets you make relatively compact bunches of straw that you can then push between straw-bales.
6. Wet the walls down
I think the most common error I see is applying plasters over dry substrates. I hose down the surface of the straw until the water drips off, and then allow the water to absorb for 20 to 30 minutes. The straw should feel pliable (not prickly), but all the water you spray on should be absorbed (not creating a water slick). If you have a water slick, the clay plaster will slide right off the straw and drive you crazy. If the straw is dry, it has a tendency to quickly suck water out of your plaster, which can cause the bonded clay to dry too quickly and subsequently reduce the adherence of the clay to the straw.
Tips for your first coat of plaster
In order to ensure a fabulous bond of the first coat of clay to the straw-bale wall surface, I do the following:
High clay content
I used to try to control cracking in the first coat of clay by adding sand and sometimes straw, but this mixture is so difficult to apply because it is not as sticky. So I have shifted gears toward a very high clay content, shooting for between 1/3 and up to 1/2 total clay content (the remainder is sand from the soil). I do not add straw to this layer, instead working the clay into the surface of the straw-bale walls. The high clay content means you will have shrinkage, and therefore probably lots of cracking, in that base coat of plaster. But I find I am able to get a much stronger bond with the base coat if the mixture is nice and sticky, and you can easily address the cracking in the next layer of plaster.
Sift soils through a 1/2″ screening
If you are using site soils, I recommend to sift the clayey-soil through a 1/2″ screen to break up the soil into granola-sized chunks. This makes the plaster easier to mix, and you don’t end up with large chunks in your plaster that are difficult or impossible to work into the wall. You don’t need finer screening unless you are trowelling onto a hard substrate in thin layers.
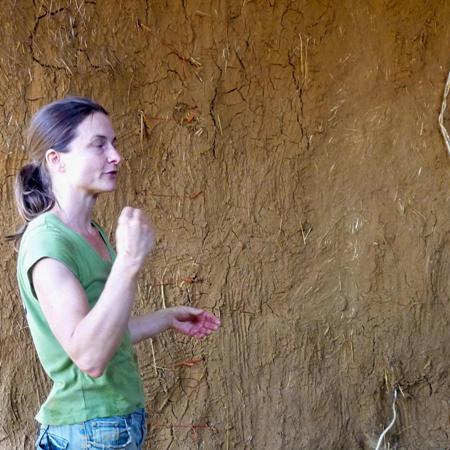
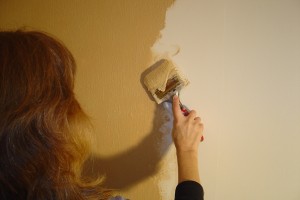
Apply the first coat with your hands
When teaching plaster workshops, I used to invite everyone to use their hands or a trowel to apply the first coat of clay plaster on straw-bale walls, depending on their own comfort level with tools. And invariably, someone with trowelling expertise would apply a vast amount of plaster on a wall, and it would look great, and then… it would fall off. What was happening is that by using the trowel instead of their hands, they couldn’t feel whether the clay was worked into the straw. So now I always apply the first coat of clay plaster directly onto the straw-bales exclusively by hand (or with gloves), and not at all with a trowel. This way you can feel with your hands the tactile bond between the clay and the straw. You can feel if the straw is loose, like at seams between bales, and you can then work additional clay into those spots.You can feel if the clay is tight on the straw or if it shimmies like jello and is not bonded.
Really work the plaster into the straw
This is probably the toughest to explain in words, but basically, you want to work the sticky plaster onto the surface of all the straw-bales, but also into all of the nooks and crannies between straw-bales, as well as the joints where straw meets other materials. I use the palm of my hand as a trowel to apply plaster to the surface of the bales, and I use my fingers to massage the clay into any loose spots between bales. Once you have some sticky plaster bonded to the straw, you can add lots of straw to your mix, and use that heavy-fibre plaster to fill in any big voids. The straw-plaster will stick nicely to the clayey-plaster that you already worked onto the bales.
Don’t worry about how it looks
The most important quality for the first coat of clay plaster is that the clay bonds well to the straw – it is not what the shape of the wall looks like. That is not to say you cannot shape the wall with this coat of plaster, but the primary goal is the bond to the straw, not the look of the wall.
Clay plastering resources
These are the most useful books I’ve found for information on making and applying clay plasters:
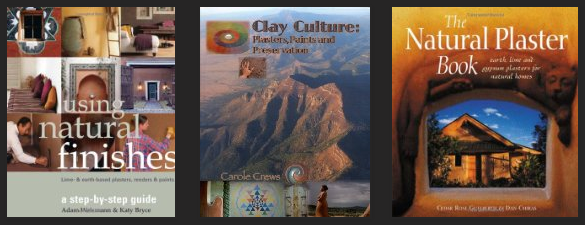
- Using Natural Finishes: Lime- & Earth-Based Plasters, Renders & Paints, A Step-by-Step Guide by Adam Weismann and Katy Bryce, Green Books Ltd, 2008
- Clay Culture: Plasters, Paints and Preservation by Carole Crews, Gourmet Adobe Press, 2010
- The Natural Plaster Book: Earth, Lime and Gypsum Plasters for Natural Homes by Cedar Rose Guelberth and Dan Chiras, New Society Publishers, 2003.
Find the original post over on the Build Naturally blog here.
 About the author
Sigi Koko is the principal designer at Down to Earth Design, which she founded in 1998 to help her clients manifest their dreams of living in a natural, healthy home. She also teaches natural building workshops that empower her clients to contribute creatively during the construction of their own home. You can find out more about her work on her website and blog.
The views expressed in our blog are those of the author and not necessarily lowimpact.org's
 The science behind the health benefits of clay plasters
 The science behind the environmental benefits of clay plasters
 The benefits and challenges of natural paints with Sigi Koko
 Putting straw on the public building map: the UP STRAW 2020 Yearbook
 How to plaster straw-bale walls with clay: the second coat
 How strawbale construction can help reduce your carbon footprint
 Clay & earth plasters
 Low-impact building
 Straw-bale building


