Layout your netting on a towel (the towel will absorb moisture later).
Open out the net – you will be working on one side of this and folding the other side over the picture.
Put your base wool (can be white or coloured) on top of the green mesh. This is your ‘page’ to draw on.
Pull out your carded wool fibres (fleece straight from the sheep should be gently washed and carded) – this carding can be done with the fingertips or with a wool carder or pet brush.
Using a photo or drawing guideline visualise the picture you wish to create… it is just like creating a painting – all background washes are done first – such as the sky, mountains or foreground.
Think about what direction the light would be coming from as this will give you shadowing even if the light source is not seen.
Skies
Use wisps of pale blues for sunny days and don’t be afraid to mix purples and small amounts of dark colours for stormy or darker days.
Sunsets allow for a riot of colours to be used …remember to reflect those colours in any water features.
Mountains
Contrasts in colours and using different tones give an impression of depth to a mountain scene. Mountains in the distance are mostly paler as they recede.
Water
Water in a landscape or seascape can really enhance a picture, it can provide a different texture and link the sky and the land with just a touch of similar colouring.
Seas with a little touch of white silk in horizontal lines can give the impression of waves or wet sand on a beach
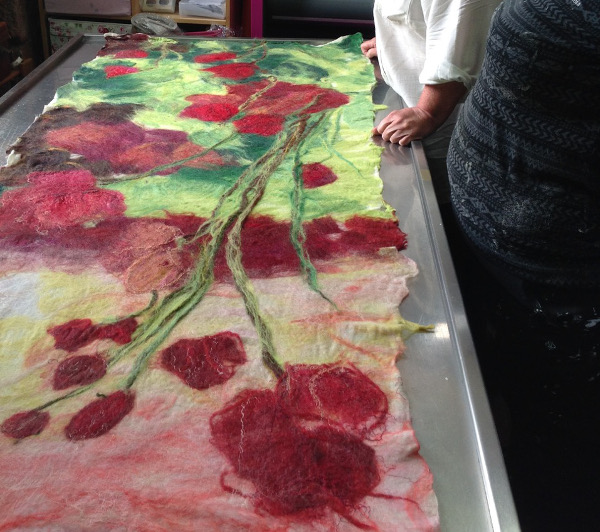
Consider foreground detail such as grass and flowers (your little bags of coloured wool sprinkles work well here).

Lay out your painting with several fine, thin layers of fibre rather than many large thick pieces.
Details such as trees are laid on top of the background colour.
Fine branches can be made by rolling little lengths of dry felt into thread like pieces and over lapping into branch shapes.
Foreground details are laid on last.
When happy with your design fold over the empty piece of net so that you have net on both the bottom and top of your picture.
Use warm water in a bowl or cup and sprinkle over the top of the net.
Take the soap in your hands and wet it well. Lather the soap in your hands and then place both hands palms down on the net and press flat.
Do not rub at this stage as you will move the design.
If the wool is still bouncy then it needs more water and soap. If flat, then it’s ready.
When completely flat, turn over the picture keeping it inside the net .
It is best to begin rubbing on the back of the felt as it keeps the design intact in the initial stages.
Always rub in a circular motion.
When the whole of the surface has been rubbed several times, the picture can be checked by carefully lifting off the net.
Lay the net back over the picture and continue to rub on the net, picture side facing you.
More soap can be added at this stage to allow your hands to move more smoothly over the surface.
Rolling Stage
The net can be rolled up and covered with the towel which soaks ups the excess water and holds the roll in place allowing you to roll.
For rolling the palms of the hands are placed on top of the roll and pushed forward and back wards for a number of rolls (25 is often a good number to work with).
After 25 rolls open out the towel and then unroll the net.
The felt and net together is lifted and placed at 90 degrees, then rolled back up then the towel is rolled around it. The whole bundle is rolled for another 25 times.
This is repeated until each edge of the picture has been on the inside of the roll.
The wool will shrink more from the inside of the roll due to friction.
At this stage open the net up and check the picture. If all the wool is secure you can lift the net away.
As a picture to be stitched into or framed to be put on the wall, a softer felt is suitable and your picture could be rinsed of the soap under warm water, squeezed and laid flat to dry.
If your picture is part of a wearable item such as a bag or a cushion it will need to be more firmly felted to be fit for purpose.
The shrinkage rate can be 20-35%.
A felted page can be made anytime with wool laid in layers of different directions or prefelt can be bought by the sheet or metre.
Thanks to Liz Gaffney of Heartfelt By Liz for information.
Workshops in many kinds of felt making are held at Liz’s Studio at Dalmally Railway Station.