Candlemaking - introduction
Lowimpact.org is now archived. Topics are now curated by specialists on Growing the Commons. Here’s Candlemaking on GtC.

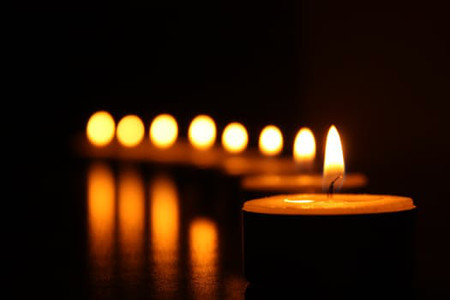
“All the darkness in the world cannot extinguish the light of a single candle.” – Francis of Assisi
Contents
What is candlemaking?
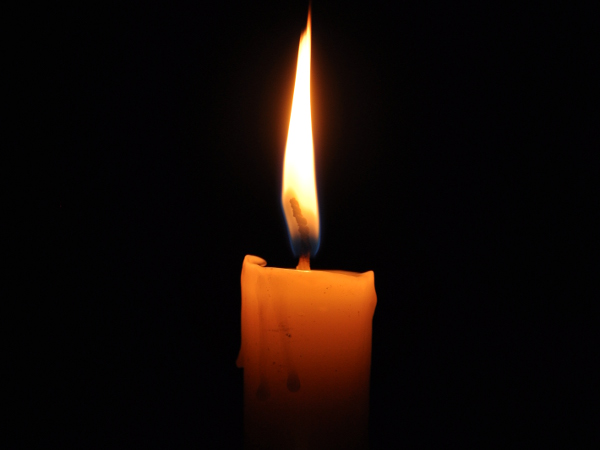
Candlemaking is making a light source from a flammable wick surrounded by a combustible material (usually wax, usually solid). Candles have been used to light people’s homes and journeys since long before the advent of electricity. The symbolic properties of light also mean that candles have traditionally played an important part in ceremonies and festivals around the world.
When a candle wick is lit, the flame melts the wax nearest to it, which travels up the wick via capillary action and is vaporised by the flame, mixes with oxygen and becomes the fuel for the flame to continue burning. As the wax is used up and the candle becomes smaller, the wick becomes shorter too, as more of it is exposed, and capillary action isn’t enough for the liquid wax to reach the top, so it is burnt down a little bit. The whole process continues until the candle is gone.
The three main types of candle are:
Container: melted wax is poured around a wick in a glass, jar or other container and allowed to set.
Pillar: melted wax is poured into a mould, which is removed after the was has set.
Taper: a wick is dipped in melted wax and allowed to cool; the process is repeated until the desired thickness of wax is reached.
History
Early candles were made from rush lights or papyrus soaked in animal fat, though these lacked the wick of true candles. Over the centuries, different cultures experimented with adding a wick to a variety of combustible materials and by the Middle Ages tallow (from rendered animal fat) was the most common material for household candles across Europe. The introduction of cleaner-burning beeswax – obtained from bee-keeping monasteries – was a major improvement over the smelly, sooty tallow, but the high cost meant they were only affordable by the church or the wealthy. The development of stearin wax (from animal fat), paraffin wax (from petroleum) and braided wicks in the 19th century marked the high point of industrial production, but candle making declined shortly afterwards with the advent of electric lighting.
Today, apart from the odd retro power cut, candles are almost exclusively used for decorative or therapeutic purposes and ‘natural’ waxes such as beeswax, soy and palm are now preferred over paraffin wax by hobbyists and small producers. Essential oils can be added for fragrance.

What are the benefits of candlemaking?
Candles are a way of providing light without using electricity – beneficial from an environmental perspective, but also very useful in case of power cuts, or in remote areas away from the power grid. With minimal equipment and outlay it’s feasible to make your own candles at home which you can then use for decoration and relaxation, or as a beautiful, individual gift. Assuming you’re buying wax and essential oils in bulk, making your own candles is very cost-effective, and certainly cheaper than buying the same thing from a craft shop.
As with any craft, it’s fun and deeply satisfying to learn how to make candles. It’s a very low-tech, therapeutic process as it just can’t be rushed. With beeswax candles in particular, it can take several hours to make a batch, so patience is an essential ingredient.
Wax and wicks are one-use-only but you can recycle containers as many times as you like. They can even be returned to their original use after a good wash with hot soapy water if using natural, non-chemical waxes that leave no residue.
Materials
While the amount of raw materials used doesn’t differ that much from mass production, natural waxes are preferred by some craftspeople as being more environmentally-friendly than paraffin. They certainly give off a gentler, subtler fragrance and have the obvious advantage of not being a petroleum derivative in terms of production.
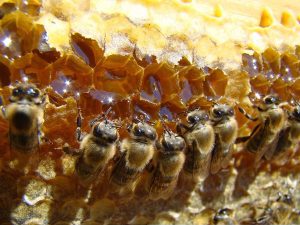
However, waxes like soy and palm may well come from large-scale commercial farming which has been shown to be responsible for deforestation and environmental destruction in some of the most vulnerable parts of the world. If you keep your own bees, or can get hold of beeswax locally then this is the most sustainable material to use.
For smallholders with livestock, tallow / animal fat candles will be the cheapest and most sustainable, and some people who make and use them say that the smell is not bad; but if you think it is, you can add a little beeswax to increase hardness and reduce odour.
What can I do?
Candlemaking is suitable for all ages and great fun for kids (properly supervised). It’s pretty safe as melt temperatures are fairly low: if you’re doing it right the wax should never get hot enough to burn the skin. Cover surfaces or use an old table to work on; any unwanted wax spills can normally be cleaned up with a hairdryer and soft cloth. Obviously you need to be careful around hot hobs and pans of water, and oven or safety gloves should be worn when handling neat fragrance or essential oils. Special care needs to be taken with fragrance or essential oils around children or pregnant women and you should only ever use materials – including waxes, fragrances and oils – that have been approved for use in candlemaking and are safe for burning.
Candles can be made in a range of shapes and sizes, from tiny tealights or tall, slender tapers to hefty free-standing pillar candles or container candles. The best way to get started is to take a candlemaking course or watch online candlemaking tutorials. By and large, if you follow manufacturers’ instructions re waxes, wicks and melt temperatures you shouldn’t have too many problems producing the more popular candle types. However, as always, lots of practice makes perfect, and experience will help you deal with common problems like bubbles in the wax.
The materials and equipment for candlemaking can be found locally or online at craft / candlemaking suppliers. Ask for any specific requirements you might have. What you need for the basics are:
Wax – comes in flakes or pellets depending on the
type.- Pan or bain-marie for melting on the hob.
- Dipping tin (for beeswax candles).
- Thermometer.
- Set of scales.
- Suitable containers or moulds (pillar candles) plus stand.
- Appropriate wick for the type of candle you’re making.
- Glue gun to fix the wick in place.
- Coloured wax if using (tends to be paraffin-wax based).
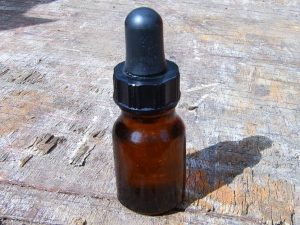
- Essential or fragrance oils if using.
- Oven or safety gloves and an apron.
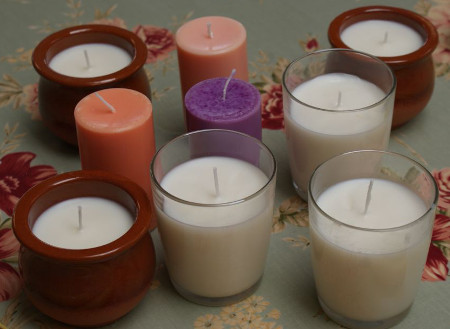
Container candles
Container candles are by far the most popular type sold or made on candlemaking crafts courses. You can use any suitable heat-proof receptacle, from tumblers to teacups to jam jars, all of which can be scrounged from around the home or rooted out in charity shops and jumble sales if you don’t want to buy them new. Here’s how to make them:
Calculate the volume of container by weighing it empty and filling it with water, then weighing it again to find the weight of water it contains.
Weigh out the same amount of wax (wax will weigh more-or-less the same as water), but leave enough room for fragrance oils / colour if using them, and melt in the pan or bain-marie at 60°C maximum.
Add essential or fragrance oils and colour if using. Oils can be added up to 10% of candle volume. Any more will affect the solidity. Natural waxes don’t take as much colour as paraffin so you tend to end up with gentle hues rather than strong colours. Take care not to add too much colour as this can affect the burning properties of the candle.
Wicks usually come with a little metal disc on the bottom which you glue into the bottom of the container with the glue gun. Trim the wick to the desired size, i.e. not so long that it flops over into the wax.
Pour in the melted wax at around 55°C for metal containers; 40-44°C for glass or ceramic containers (which should be at room temperature).
Leave to cool in a draught-free area. You can buy special wick holders – or make them yourself out of chopsticks or barbecue skewers – to keep the wick upright during cooling (although if you pour at the correct temperature this shouldn’t be an issue anyway).
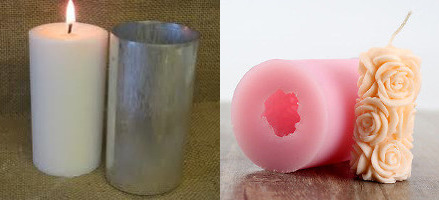
Pillar candles
Pillar candle wax is harder as it needs to support itself unaided and can only take about 2-3% essential oils. Here you do need to spend some money on special moulds, which come in everything from cheap, straight-sided aluminium to more expensive and elaborate shapes in plastic and latex (the term ‘pillar’ is a bit of a misnomer as these days they come in a wide variety of shapes and forms).
Weighing, measuring and melting process is the same as for containers.
Thread the wick through the hole in the end of the mould and seal it with a little Blu-tac or similar to prevent leakage.
Grease the mould with a little vegetable oil, place upside down in the stand and add wax at 55°C.
Leave to cool. Once almost solid, make a hole either side of the wick to check for air holes and top up with melted wax.
Once solid, place the candles in the freezer for no more than 10 minutes to cool. They will contract on cooling so be ready to top up with a bit more wax.
Once cool, pull them out of the mould by the wick and trim the bottom off neatly.
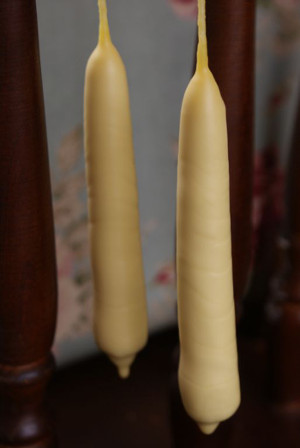
Tapers
While a little more time-consuming than other candlemaking methods, beeswax tapers look and smell nice and are clean-burning.
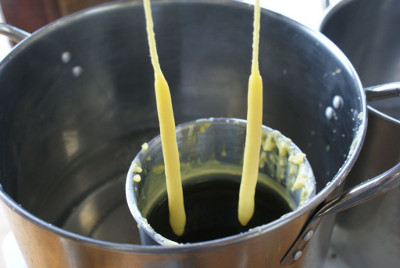
Melt the wax pellets in a heat-proof, wide-aperture dipping can (you can use stainless steel utensil holders or clean tin cans) in a bain-marie.
Dunk a length of cotton wick in the wax, let any air bubbles come to the surface and remove the wick. Pull on both ends to straighten it.
Leave to cool hanging from a slit in a piece of card.
Once cool, repeat the process until you achieve the desired thickness, topping up the dipping can as necessary and snipping off drips from the end of the candle as you go (the more layers, the longer they take to cool each time.
Once done, dip the candle in cold water to cool it and give it a nice sheen. Trim the bottom and the wick as required.
Specialist(s)
Thanks to Sarah Harper of Rowan Tree Studio for information.
Thanks to the specialist(s) below for help with this topic over the years.

Sarah Harper is the owner of the Clovelly Soap Company and Rowan Tree Studio in North Devon. She has been making candles as part of their product range for 6 years as well as teaching candlemaking at her craft studio. She makes plant wax container candles, pillar candles, beeswax dipped candles and fire lighters and melt using natural waxes and essential oils.
Comments
Comments on Lowimpact.org are now closed. To comment or post a query about this topic, please go to the relevant section of the Growing the Commons forum.