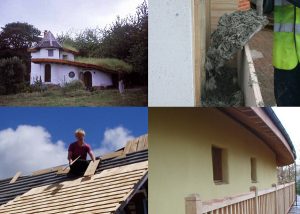
Sigi Koko teaches us the different approaches to the levelling layer in Part 3 of how to build an adobe earthen floor. Missed out on Parts 1 and 2? Find them here and here.
6: The levelling layer
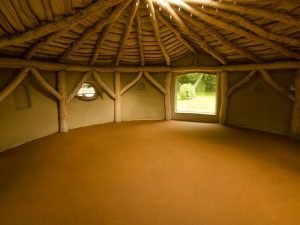
There are a few approaches you can take for this layer. What I do is float this layer smooth and then polish it as it hardens. Some people float this layer reasonably smoothly, and then apply a super thin layer for the desired texture. The benefit of polishing this layer as your finish floor is that you avoid the extra step of additional layers. The benefit of applying a thin final layer is that it’s easier to control the texture of a thin coat than it is to control the texture of a thicker poured floor. So you can decide which is less stressful to you. But either way, the goal of this layer is to end up with a floor that is level (and if it’s your finish, then level and smooth). In the first layer, small imperfections are not a concern, but this layer is what you will see for years to come.
This second layer uses the same adobe mixture as the base layer, with two modifications:
- If using clay soil from the site, I sift it a bit finer…I use 1/4″ screening for this layer
- Any straw in this layer should be chopped to 1″ or shorter
Why these changes? Because smaller particles allow you to float the floor to a finer finish. I don’t always use straw in this layer of the floor, since it will show in the finish surface and not everyone wants/likes that look. If you eliminate the straw, then it is absolutely crucial to get the ratio of clay to sand perfect. To do this, make some test patches of your floor and see how they dry. If they are crumbly and weak, there is not enough clay. If they crack, there is not enough sand.
The process for laying this layer is as follows.
- Make a batch of your mix, making sure that it is fairly creamy; wet it just enough so that when you hold a handful flat in your hand it keeps a mounded shape until you vibrate your hand slightly, then it flows like a liquid
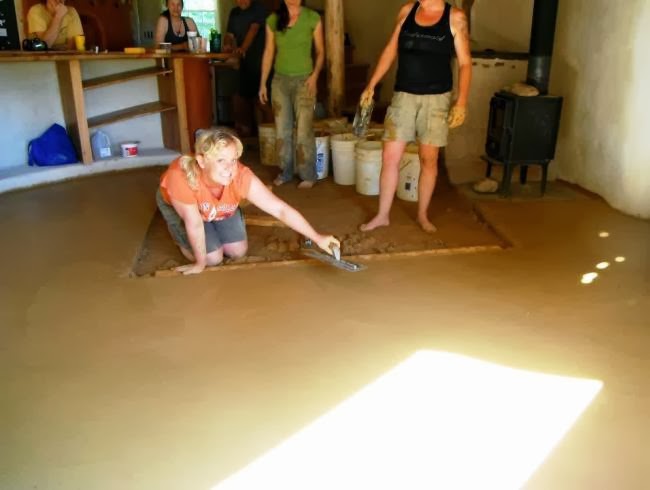
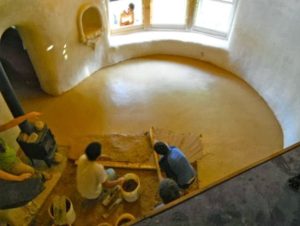
- Make sure you have height reference points in place; I use screed boards that are the same thickness as the floor I want to install (for example, I use a flat 2×4 for a 1-1/2″ thick floor – see photo below)

Credit: Sigi Koko
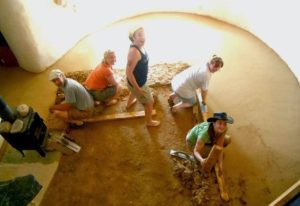
- Start at the farthest corner of your floor (and work your way out toward an exit path), and work in swaths that you can easily reach without over-extending your body
- Roughly pack the mixture into place, being sure to push into any corners or voids (you can literally throw the adobe into corners to be sure you get good fill); make sure your material is filled a bit higher than you want your finished layer to end up

Credit: Sigi Koko
- Use a very straight 2×4 (or 2×6) that is long enough to touch 2 of your screed boards, push down to create firm contact with the screed boards, and then shimmy your board side-to-side to level the floor; as material builds up in front of your board, simply stop, scrape the excess out of your way, and keep going; the floor shape should be pretty level, but you may have some voids here and there
- I then use a wood float or a magnesium float and fine-tune the surface; add little bits of material if you need to fill any voids, and just keep working the surface until it is level and reasonably smooth (see photos below for examples of what it will look like)

Credit: Sigi Koko
- Your final pass while the floor is wet is with a flexible pool float; this will bring a bit of water (and with it, clay) to the surface and allow you to really make the surface look pretty; but don’t go over the surface too much here, or you will bring too much clay to the top and the floor will crack as it dries
- Continue until your floor is completely installed, moving the screed boards as you go
- Finally you will burnish the surface of the adobe floor as the clay becomes leather hard (firm enough that you definitely couldn’t trowel it anymore, but soft enough that you can just barely make a thumb print in the surface); slightly mist a small area with water and make quick, tight circles using a very flexible float made from steel or plastic; the amount of pressure you can apply will depend on the dampness of the floor; you should see a slight sheen on the surface as you burnish and any hairline cracks will be pushed closed; if you wait too long to burnish, the clay will be too dry & hard, and you will need to skip the burnishing

Credit: Sigi Koko
- Then let the floor dry completely (and don’t let it freeze until it is 100% dry)
You can watch my video below to understand more about the different types of floats and how best to use them:
In the final part of the series, we’ll go on to cover the final finish, additives and resources to ensure the smoothest of adobe earthen floors.
Find the original post here on Sigi Koko’s Building Naturally blog.
 About the author
Sigi Koko is the principal designer at Down to Earth Design, which she founded in 1998 to help her clients manifest their dreams of living in a natural, healthy home. She also teaches natural building workshops that empower her clients to contribute creatively during the construction of their own home. You can find out more about her work on her website and blog.

7 Comments
Excellent article, thank-you
Thank you for this interesting trilogy of blogs Sigi. I have a few questions:
1. How does the floor (and different layers) tolerate thermal expansion and contraction? I am no expert on clay but I have seen how mud cracks when it dries.
2. What about vertical movement? I would expect that the insulating layer (particularly if rockwool is used) will be prone to compression over time. And, if the higher layers are hardened clay then I would expect there to be problems. I notice that you didn’t leave any expansion gaps around the edges. How do you cater for settling in higher layers?
3. Sorry if I have missed it, but I cannot see that you have mentioned whether this design of flooring is suitable for warm as well as colder climates. From the pictures, you appear to be somewhere warm.
Andrew
@Andrew Rollinson
1. so this is really 2 questions…thermal expansion is not an issue unless you are reaching temperatures in the hundreds of degrees. Not a condition that occurs with a typical floor. And the reason clay cracks when it dries is because the volume of the water leaves…so the clay is literally smaller dry than wet. That is why there is sand in your floor recipe. You need to make tests to ensure you have enough sand to prevent shrinkage as the clay dries. Once dry, it is stable.
2. you cannot use rockwool insulation under a slab floor. You need something rigid. This is true for any slab floor. There is no compression issue with the adobe itself.
3. Any climate is appropriate if your detailing & insulation is correct for your climate. (I’m in a 4-season climate)
Thank you Sigi,
I mentioned rockwool because you say that it is a suitable insulation layer in your first blog.
Andrew
There is a rigid rockwool product that can be used below grade…that would be ok. But regular, fluffy rock wool is not suitable
After applying the first layer of adobe floor, do I need to wait till it completely dries before I apply the finish layer?
Yes, always let every layer dry before continuing to the next layer