We learn from Sigi Koko at Down to Earth Design about how to build a cob oven using local natural materials and firewood as fuel. In this first installment, she covers the preparation stages.
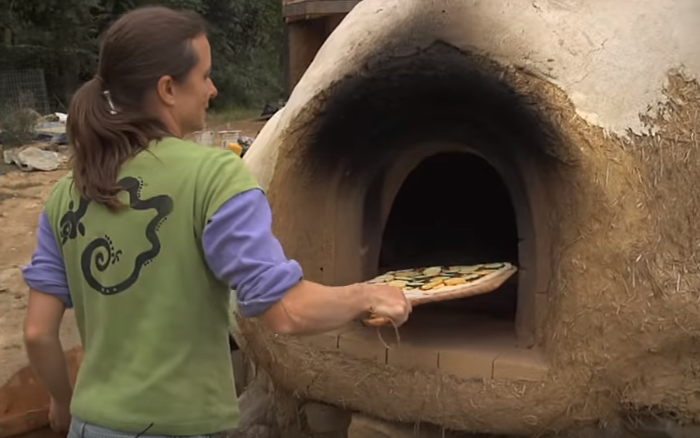
If you are looking for a small project to get your hands (and feet!) dirty testing out some natural building skills, then building a wood-fired oven is a great place to start. If you have a little help, it takes just a couple days to build, then a few weeks to let it dry out (during which time, you can sculpt your oven to any shape) and then you’re ready for a pizza party!
What is a cob wood-fired pizza oven?
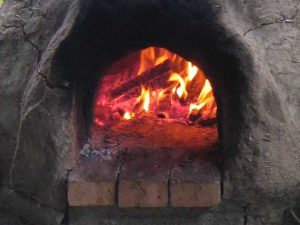
Well, it’s a baking oven that is heated by lighting a fire inside, the fire warms up a thick clay oven wall, and the clay wall remains warm for hours after the fire is pulled out. So you build the fire in the same oven area that becomes your baking space.
The beauty of this type of oven is a) the oven is simple to build using local, natural materials and b) the oven temperature remains very even throughout, with no hot or cold spots. Plus, it’s a fun project to do with a bunch of people (and did we mention you can celebrate your accomplishment with a pizza party?!).
So, what do you need to know to ensure that your oven project is successful?
First, get this book.

Decide on the size
Second, decide what size oven you want to build. The appropriate size for you will depend on how you intend to use your oven. Here are the variables effected by size:
- The larger the oven, the more materials you need to build it. For example, an oven that is 36″ wide inside takes about twice as much clay, sand, & straw as an oven that is 24″ wide inside. And more materials translates to more building time as well.
- The larger the oven, the longer it takes to heat up. For example, a 24″ wide oven takes about 2 hours of fire to heat up, whereas a 36″ oven takes about 3 hours.
- The larger the oven, the more mass, so the longer the oven stays warm. This means you can cook in it longer each time you fire it up, especially if you have a good insulation layer on your oven.
- And obviously, the larger your oven, the more pizzas you can bake at once! (Or whatever you are cooking…)
So think about how long you want to wait for your oven to heat up, how long you want the oven to stay hot (larger oven for pizza party use, smaller oven for personal use), and think about how big of a project you want to take on – do you want to build a small oven over 2 days or go for a larger oven and spend longer to build?
Typical sizes are 22-1/2″, 27″, or 36″ (these sizes work out well with the size of standard fire brick). Of course, there are mini ovens as well as massive ovens, but those are mostly for special use applications.
To roof or not to roof?
Third, decide if you will build a roof over your oven.
A roof will help protect your oven from the elements, and allows you to bake even when the weather is sucky. Rain especially will erode a clay oven over time. You can either allow that, re-plaster your oven every year, put a tarp over your oven when it’s not in use, or you can build a roof to protect it. If you decide to build a roof, those materials will be in addition to those listed below. Build your roof so you have plenty of room to stand underneath, and to clear any smoke out. I recommend at least 7 feet of clearance under the roof.

Credit: Sigi Koko
Materials
Fourth, gather your materials. You will need the following materials to build your oven:
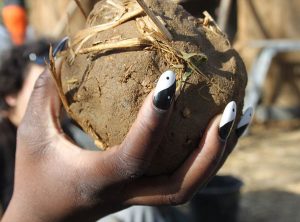
1. Clay: Clay is your essential ingredient, because it is the binder that holds all the materials together. When wet, clay is sticky. When it dries, it is strong & hard. You can use clay-soil or you can purchase dry, bagged, pottery clay. (See video below on how to test your soil for clay content). If you are using clay soil, you will need to determine the proportion of clay in your soil (it may feel like it’s 100% clay, but it rarely actually is – usually there is sand in there as well).
How much? The amount of clay needed depends on the size oven you are building. Here I am talking about total clay, so if you are using soil with clay in it, you will calculate the amount of clay based on the percentage of clay in the soil. (So, if your soil is 50% clay & 50% sand then every bucket of soil = 1/2 bucket of clay & 1/2 bucket of sand). So total clay needed is about 25 gallons for a 22-1/2″ oven, about 35 gallons for a 27″ oven and about 50 gallons for a 36″ oven.
2. Sand: Sand is your aggregate. It reduces shrinkage of the clay as it dries and it adds total strength to your oven walls. You need to use angular sand, not smooth sand or silt. Concrete sand is pretty cheap & works great. I also use sand to build the form for the oven (this sand is taken out at the end and can be used to make plaster if you finish your oven that way).
How much? Plan on about 300 to 500 lbs of sand if you are using clay soil with at least 50% sand content; if you are using bagged pottery clay, double the sand.
3. Straw: Straw is used to create an insulating layer for your oven. It is also helpful to stand on the bales as your oven gets tall. Make sure your straw is clean, dry, and mould-free.
How much? You need about 2 to 3 straw bales for a small oven and 3 to 4 straw bales for a larger oven. If you plan to sculpt your oven into a fun shape, make sure you have ample straw.
4. Firebricks: This is what I like to use for the floor of the oven, because they don’t split in the heat of the fire and they have extremely squared edges, so they make a really smooth floor. Typical firebrick are 4-1/2″ x 9″ x 1-1/2″. You can lay out the bricks for your desired oven size to see exactly how many you need, but below is what I use as a reference.
How much? I use 15 firebricks for a 22-1/2″ oven (12 for the floor + 3 for the door opening), 22 firebricks for a 27″ oven (18 for the floor + 4 for the door opening), and 37 firebricks for a 36″ oven (32 for the floor + 5 for the door opening).
5. Water: you will need a running water source to wet the clay binder – it is also helpful for clean-up!
6. Newspaper (optional): I use this as a layer between my sand form and the first layer of clay. It lets you know when to stop digging out your sand so you don’t accidentally gouge your oven wall.
7. Stones or bricks or urbanite (optional): I recommend building your oven up on a base so you don’t have to kneel on the ground to tend your fire and bake. A comfortable height is typically 24″ to 36″ off the ground but choose whichever height is comfortable to you. You can use any kind of masonry material that is available to you and you can make cob (clay, sand and straw) to make a strong mortar. Just make sure that your oven base is very stable. Once the base is built and dry, don’t forget to fill in the centre (with something sturdy & non-compressible) so you have something solid to build your oven floor on.
Note: I highly recommend collecting extra material than you think you need so you don’t run out of anything mid-stream.
How to test your soil to see if it has clay in it
And this is my tools list when doing an oven workshop…
- Buckets – I like to have ample 5-gallon buckets. You need these to transport and measure your materials. To me, 5 buckets is a minimum, but if you are working alone, one bucket will work.
- Tarpaulins – I like to have 2 tarps, but one works. 10′ x 10′ seems to be a manageable size.
- Shovels – if you are working alone, one shovel is fine. If you are going to have a bunch of people, have at least one shovel for sand and one for clay and more if you will have lots of helpers.
- Sifter – if you are using clay soil dug out of the ground, I find it easiest to sift it roughly through a 1/2″ screen to remove any rocks and to break up the clay and make it easier to mix. I like a table screen that fits over a wheelbarrow.
- Wheelbarrow – a wheelbarrow is useful to transport material but is not essential.
Now you’re all set to start the building process itself – look out for Part 2 coming soon!
Find the original post here on Sigi Koko’s Building Naturally blog.
 About the author
Sigi Koko is the principal designer at Down to Earth Design, which she founded in 1998 to help her clients manifest their dreams of living in a natural, healthy home. She also teaches natural building workshops that empower her clients to contribute creatively during the construction of their own home. You can find out more about her work on her website and blog.