Mushroom grower extraordinaire Benedict Noel explains how to prepare mushroom spawn using a pressure cooker, as his Mushroom Guide series continues.
If you’ve missed them, read Parts 1, 2, 3, 4, 5 and 6 first.
Pressure cooking
Once your jars or bags are ready, you need to stack them in your pressure cooker. Make sure you read your pressure cooker instructions carefully and always remember to fill it with water so that at a minimum the water level is above the bottom plate.

Be sure to carefully read the instructions for your pressure cooker!
The amount of time that you’ll need to pressure cook for will depend on the amount of spawn that you’re pressure cooking. If you’ve only got a couple of jars, 60-90 minutes at 15 PSI is sufficient. If I have several small bags of grain, I will pressure cook for at least 2 hours and if the pressure cooker is crammed full of large bags, I’ll cook for 3 hours. You need to ensure that all of the grain gets to 121C/15PSI and it can take a long time for the centre of the bags to heat up enough to kill unwanted contaminants.
Adding a mushroom culture to your spawn
From liquid culture
The easiest way for any home cultivator to create grain spawn is by using a liquid culture starter. The reason for this is that you don’t need a sterile environment to perform inoculations. You will need to use airport lids on your jars so that you don’t expose the sterilised grain to air that contains potential contaminants.

Liquid culture syringe with shiitake 3782 mycelium.
Gather your liquid culture syringe, an alcohol wipe or alcohol spray bottle and your jar with airport lid. Shake your liquid culture syringe to break up the mycelium as much as possible. If it’s not your first time using this syringe, hold the needle under a flame (lighter/alcohol lamp) until the needle goes red hot. Then, squirt a tiny amount of culture out of the needle to cool it down.
Spray/swab the injection port of your lid with your alcohol. Then, insert your needle through the port and inject a couple of millilitres of liquid culture into the jar.
From agar
If transferring from agar, you’ll need to do this in a sterile environment, either in a still air box or in front of a flow hood. If you’re starting out, you’ll probably be using a still air box, since they’re cheap and easy to make.
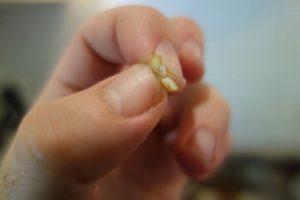
Only a tiny amount of agar needs to be added to your grain spawn so in most cases I’ll divide the whole plate between several jars. You can cut your agar with either a sterilised scalpel or dental pick. I find that a dental pick is better when transferring from agar to agar or agar to slant and a scalpel is better when transferring to grain spawn. In your sterile environment, quickly open your agar plate and cut the plate into wedges then cut around the side of the plate. Stab into a wedge and add it to a jar with as little exposure to the air as possible.
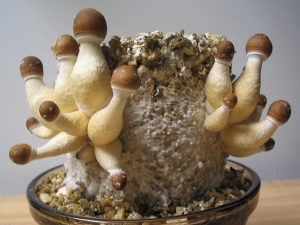
Expanding from grain spawn
This is probably the quickest and easiest way to expand your culture. If you have a jar or bag that already contains colonised grain spawn, you simply need to break a little bit off the colonised spawn and add it to your sterilised grain.
Typically you’ll do this if you need to create a lot of spawn. First, you’ll create some grain spawn in a smaller jar: this will be your generation 1 master (G1) spawn. Once the G1 is colonised, you’ll sterilise grain in many more containers and transfer a small amount of the G1 spawn into each of them to create G2 spawn. Typically you can expand your grain spawn by 10-20 times when performing grain to grain transfers. This means that if you start with 1 kg of grain spawn, you can expand it to 10-20 kg of spawn.
Next time, we’ll get started working with cultures.
Based on an original post available here by Benedict Noel at The Mushroom Guide.
 About the author
The Mushroom Guide is written by Benedict Noel from Perth, Western Australia. He’s been hooked on mushroom growing since watching this TED talk in 2015 and has been building his knowledge and experience ever since. Since starting out, he’s helped run a couple of cultivation courses, given presentations at festivals and grown a wide variety of mushrooms, from oyster and shiitake to pioppino and chestnut.