How to grow oyster mushrooms in waste coffee grounds


The best advice for success is to start by growing Oyster mushrooms, the easiest and most forgiving variety for any home cultivator to grow. Next you must consider the growing medium. The most common materials to grow Oysters on are usually freshly cut hardwood logs or shredded straw. Growing mushrooms on logs can be quite hit or miss and will take up to a year for your first harvest. Growing on straw requires you to pasteurise the straw
first, to kill off resident micro-organisms that will compete with your mycelium.
This is where coffee comes in. The beauty of growing mushrooms on fresh coffee waste is that the substrate is already pasteurised by the coffee brewing process, so you can bypass the whole pasteurising step and get straight into the inoculating. Plus, spent coffee grounds are a huge waste resource, and are packed full of nutrients which your Oyster Mushrooms love to grow on.
Inoculating
Firstly order your spawn in. You’ll have greater success if you use a high spawn: coffee grounds ratio. To begin with, I’d recommend using around 500g of oyster mushroom spawn to each 2.5kg of spent grounds. If the vendor you purchase the spawn from also sells filter patch grow bags, get one of these too. They will increase your chance of success by reducing contamination and providing the perfect growing environment inside the bag. If you can’t source one of these, you can try using a large 2 litre freezer bag, empty ice-cream tub or milk carton – cleaned out well, and with 4 x 5mm holes cut in the sides.
Coffee collection
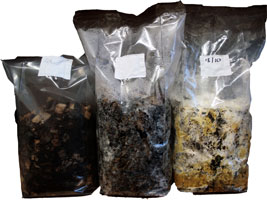
Go to a busy café and ask them nicely if they can give you some spent grounds. You’ll need enough to fill the bag or container you’re using two-thirds full, and the grounds need to be fresh that day. Most cafes will be happy to do this – if you encounter any problems, just ask at another one. Large cafes get through kilos of the stuff every day, and most are happy to see it going to good use. Take it home and (within 24 hours whilst it’s still fresh) weigh out 2.5kg of coffee into a clean mixing bowl.
Wash your hands and lower arms well and mix your spawn into the bowl, breaking it up and distributing it evenly throughout the coffee. Now load the mixture into your cultivation bag or container and close it up tight, ensuring you have cut the 4 air holes if you are not using the filter patch bags.
Spawn run
Place your bag/container in a warm (64 – 77°F, 18C – 25°C) and dark place (airing cupboard, under a bed, in a cupboard in a heated room etc). During the next three weeks, you will see the spawn come to life and grow across the coffee grounds – turning the whole mixture white by the time it has fully colonised the mixture. It’s a fun time to keep checking up on it and watch it grow from day to day.
Fruiting
After 3 weeks, your whole bag/container of the coffee and spawn mixture should now look completely white. If you see any areas of green, this is a competitor mould. If it is just a small patch, you can try adding a little salt to the area which should kill it off and still allow the mushroom mycelium to prosper. If the whole bag has gone green, then I’m afraid it’s a lost cause and will most likely be caused by poor quality spawn, or by a lot of mould spores having been mixed in with the coffee grounds somewhere along the way. However, if you have used a high rate of spawn, fresh spent grounds and followed clean hygiene, the chances are you will be looking at a nice white bag of mycelium ready to fruit you some home grown mushrooms.
Place it in a spot with plenty of fresh air and a little light – a shaded windowsill or worktop is ideal. Cut a 5cm x 5cm (2in x 2in) hole in your bag/container and spray this area twice daily with water, trying not to allow it to dry out. Mushrooms love damp, humid conditions, and they will outright refuse to grow if it’s too dry.
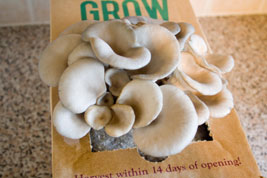
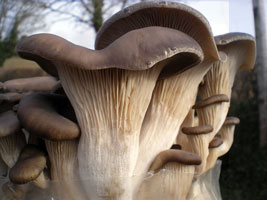
After a week or so, you will start to see tiny little mushrooms bursting into life. Over the following 5-7 days they will double in size every day. This is a really fascinating time! Each day you wake up to find them larger; looking more and more meaty and ready for the eating. When the edge of the caps begin to turn upwards, it’s time to harvest and enjoy the fruits of your labour. Cut at the base of the stems and get cooking!
If you’d like to save yourself the trouble of collecting coffee waste and inoculating the mixture, Adam sells ready-made kits on his website (www.fungi-futures.co.uk). We’ve used them ourselves and can definitely recommend them – unlike most mushroom growing kits they really work!
Thanks to Clifford Davy of Forest Foragers.


